Nanopositioning equipment manufacturers can follow the latest design rules and put the best components into their mechanisms and controllers, often to no avail.
If the user does not take the time to follow best practices for mounting, figuring out a suitable supporting structure, the right cable draping, and environmental conditions, much of the intrinsic performance can be lost.
After all, any shortcomings of the structure will confer drift, vibration, and instabilities onto the application.
It may seem basic, but we’d encourage even longtime nanopositioning users to read this through. We’ve learned some important lessons alongside some very experienced users; perhaps your application might benefit from some overlooked detail.
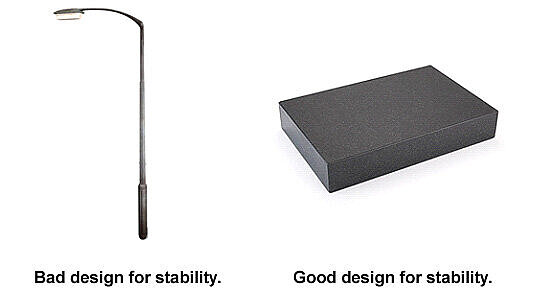
To begin, a stable structure means rigidity, flatness, and close mechanical coupling are requirements. Let’s review each of those in turn:
Rigidity / Stiffness: The Higher the Natural Frequency, the Better
- Mounting hardware must be substantial and solid. Massiveness per se isn’t necessarily desirable, as the resonant frequency of the structure goes as sqrt (stiffness/mass), so clearly it is this stiffness-to-mass ratio that should be maximized. So a flanged, triangulated, “I-beam” or boxed supporting element would be preferable to a solid component of the same dimensions or the same mass. (On the other hand, nanopositioning devices in high-dynamic applications need a significant reactive mass to push against — you don’t want to eliminate all mass in the supporting structure.)
- It’s also important that your nanopositioning and other equipment be mounted per their manufacturers’ recommendations. In particular, don’t skip bolts, and don’t use double-sided tape in lieu of bolting. The material stability of structural elements is also worth considering if drift over the very long term is important. NOTE: Replacing screw-driven mechanisms with piezomotor-driven mechanisms has proven to significantly improve long-term stability by eliminating the gradual flow of lubricants in the drive assembly.
- Structural rigidity issues often need special attention in microscopy applications, as high-throughput motion and nanopositioning equipment is often retrofitted into these systems. Thin mounting platforms, tall (sometimes hinged) structures, and long risers with little triangulation can all contribute to instability.
Flatness: Find a Flat Mounting Platform
- A nanopositioner or other precision motion device will conform to the platform it’s bolted to. Poor trajectory can be one consequence of a non-flat mounting, but other odd effects can occur. We’ve seen stages with drift issues and “hunting” problems perform perfectly once their mounting issues were resolved.
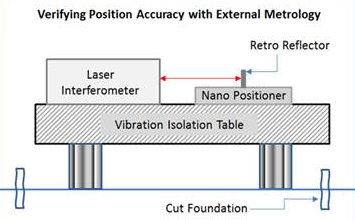
- Granite bases are best, optical (steel) tables are usually good enough. Try to mount as close to the surface as possible. When your motion setup requires sub-micron flatness, a low quality mounting surface can easily negate your investment in a high precision positioning stage.
- Similarly, over-torquing the mounting bolts can warp or even damage a stage. There’s usually no reason to torque beyond “snug tight.” In fact, when a motion issue occurs after a system is set up, over-tightening of the mounting bolts is one of the first things that should be checked.
Matching CTE’s of the Positioning Stage and the Support
- A stage made from Invar can show worse stability performance than an aluminum stage. If the Invar stage is mounted onto an aluminum plate and the temperature changes a few degrees, the difference in the expansion between the aluminum and Invar will lead to tension and warping of the stage, and consequently affect its positioning precision and flatness of motion. We see this often with microscopy customers. They look for the best stability and ask for piezo nanopositioning stages made from Invar. However, the support and the coarse positioning stage for the piezo stage are aluminum – a combination to avoid.
Close Mechanical Coupling: Avoid Cantilevers, Long Posts, Dive-Boards, and Stacks of Components
- Motion devices and their loads should be mounted rigidly together with as little cantilevering as possible. Anyone who’s walked the length of a diving board is familiar with how the magnitude of its flexing and bouncing increases and their frequency diminishes with distance from the platform. Similarly, long brackets and extenders are rarely a good idea in a nanopositioning application, though sometimes they’re necessary for various reasons. In such cases, it’s important to have realistic expectations about application throughput and settling performance.
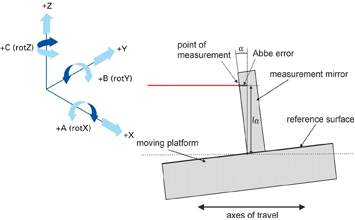
- Often, mounting extenders and offset loads not only lower resonant frequencies, but introduce additional resonant drivers such as torque moments. An interesting example was a high-speed scanning application we reviewed not long ago; it required the device-under-test to be cantilevered off the side of a fast piezoelectric nanopositioning stage. The rapid linear motions of the stage drove a pendular oscillation of the load due to nanoscale rotational ringing the stage platform. Fortunately, the cure in this case was easy: counterbalancing the load to eliminate the torque moment proved an instant cure, even though mass was consequently being added. NOTE: Optimizing the counterbalance to place the center-of-inertia rather than the center-of-mass on the stage’s centerline is needed for best results.
Avoid Boom Boxes, Fans and other “Vibration Generators“
- It may sound silly, but we’ve tracked down nanometer stability problems that were caused by a blaring boom-box next to a nanopositioning stage, vibrating in synch with the latest rap hits. And during summer months, high powered fans can make a difference for the poor scientist stuck 14 hours a day in that hot lab. That refreshing air flow feels good for the human, but may have significant side effects for the performance of the nanopositioning stage.
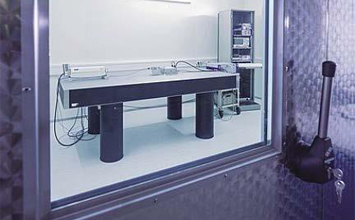
In addition, pay attention to cable draping (the subtle physics of which was discussed in another post), and minimize the use of shielding boxes on your vibration-isolation platform. Cables will efficiently transfer vibrations from fans and other sources directly to your application, while shields couple acoustics and room modes from the air to your table. Recently, Steve Ryan, Vice President of Technical Manufacturing Corporation, shared some insights on that point at a meeting we’d arranged with an accomplished customer working at the forefront of picoscale metrology. Essentially, the room acts as an air column of fundamental frequency F0 = v/2L. He noted that a typical laboratory might have a wall-to-wall dimension L on the order of perhaps 10m, and with the speed of sound v at about 340m/sec that would imply a room fundamental of approximately 17Hz — below the range of human hearing. The customer’s whole-table shielding box, at the time mounted directly to the table, was coupling that subacoustic standing wave directly to the application. Sure enough, moving the shielding box to its own supporting frame significantly improved the application’s stability.

Blog Categories
- Aero-Space
- Air Bearing Stages, Components, Systems
- Astronomy
- Automation, Nano-Automation
- Beamline Instrumentation
- Bio-Medical
- Hexapods
- Imaging & Microscopy
- Laser Machining, Processing
- Linear Actuators
- Linear Motor, Positioning System
- Metrology
- Microscopy
- Motorized Precision Positioners
- Multi-Axis Motion
- Nanopositioning
- Photonics
- Piezo Actuators, Motors
- Piezo Mechanics
- Piezo Transducers / Sensors
- Precision Machining
- Semicon
- Software Tools
- UHV Positioning Stage
- Voice Coil Linear Actuator
- X-Ray Spectroscopy

